![]()
As I mentioned in this previous post I wanted to get some things documented for future and third-party reference. Since the thesis I was preparing dealt with Financial Mathematics, the choice was more clear as to which platform to choose. LaTeX provided the most reasonable choice. Sure there was a steep learning curve ahead, and if something was acting funny it might take a long time just to find how to correct that paragraph spacing, but once you start typing and get in the flow there is no match to how fast you can churn out mathematical formulas. Plus I find that LaTeX does true typesetting and produces a much more aesthetically pleasing result.
All the information below are for OSX (10.7.4)
- LaTeX
- For the OSX the distribution I chose was MacTex. It’s a big installation (~2.1GB) but it includes all of TexLive’s binaries and will most likely have all the packeges you’ll need. The installation is pretty straightforward via a packaged (.pkg) binary.
- Latexian/ViM
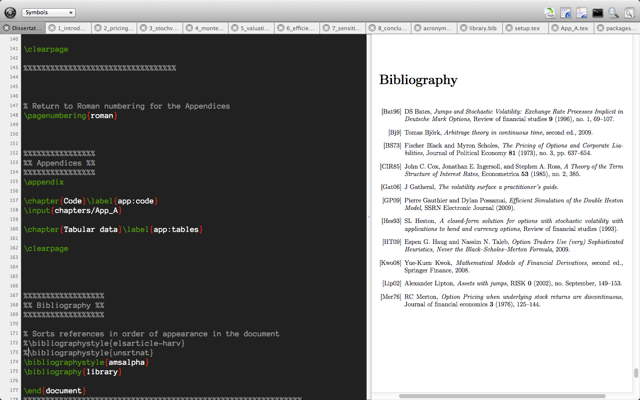
- However having the binaries of LaTeX installed is one thing, but quite another putting it all together. There are different stages in typesetting a Tex document. Most of the times it includes multiple passes so that all references and bibliography are correct. For this reason, and to cut down on some of the overhead of this complexity I opted for a license of the Latexian. It was $10 very well spent. This editor is quite remarkable for its price. I had my thesis separated in chapters, more on that later, and this editor allowed me to have proper document typesetting for each individual chapter. I simply had to define the master preview document from the ‘Get info’ menu. The other really big help is the ability to define ‘Clips’ of ready made text. for instance the code for inserting an equation to the text could be pre-defined and called via a shortcut. In order to use this figure you’ll need to have the clip defined, lets say the keyword for the clip is ‘figure’ and the code would be:
begin{equation}label{eqn:<##>} begin{aligned} <##>, end{aligned}.- The hash signs are placeholders that Latexian can use to help you navigate faster. Once the clip is defined you start by typing the keyword ‘equation’. By then hitting the <CMD>+ key combination it pops up all matching options for it. After you select which one you want, e.g. you could have ‘equation’ and ‘equation_multi_line’, you can use the <CMD>+’ key combination to jump between consecutive placeholders. Pro tip: if you add a placeholder at the end of the clip you’d be able to continue typing the subsequent text after the equation. I’ll try to “export” the clips I’d used in the hope you’d be able to copy/paste them if you need them. Unfortunately there is no Export option native in Latexian that I know of.
- The alternative free choice would be TexShop. I’ve used this for compiling XeTex for my CV with really good results, but I find it’s a bit more temperamental than Latexian and with fewer features. Trust me $10 is well spent for the increased performance you can get with Latexian.
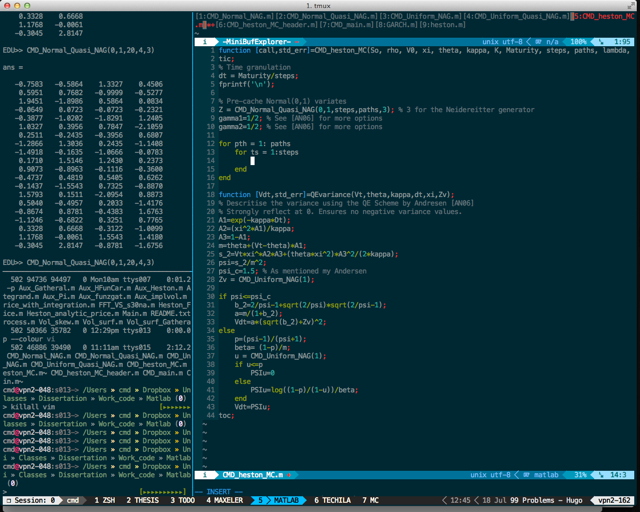
- After a while it became apparent that I was spending most of my time in ViM writing the Matlab code, I was getting much faster and more efficient typing in ViM than in the Latexian editor. Finally I ended up writing Tex Code in ViM and then just typesetting in Latexian to check the result. Latexian also has a nice function whereby you can select a piece of text and by right clicking it you can jump to the Tex code it corresponds, making correction very easy. However the search functionality in ViM can easily accomplish this, though in Latexian this works across all chapters not just the current buffer. What you’re seeing in the figure below is iTerm2 running Tmux and multiple pannels. The ViM plugin snipMate allowed me to do the same thing that Latexian’s clips did; placeholders and all. This plugin really skyrocketed my typing speed in LaTeX. I’ll follow up with a separate post how to do this kind of setup since it’s not absolutely pertinent to the thesis.

- In the figure above there is a ViM editor to the left, a grep of all the snippets available as a reminder, and in the middle a word counter for the tex files, a TODO list, and a small scriptto copy cells from Excel and ‘automagically’ paste LaTeX code.
- Mendeley
- I was looking for a tool to handle the bibliography of this project. I was very lucky to have found Mendeley. This tool did everything I wanted and had a great integration with BibTex (The most common bibliography format used in LaTeX). IT was exceptionally good at parsing well known reference sites and import bibliography data into my library, import PDFs and look up the bibliography data before importing them, and also had the feature of keeping everything into an online library with 1GB size which meant that you could work on multiple machines and still access the same library in a distributed manner. Once you did a search in Mendeley (different tags to search in Titles, Authors, or Text) you could copy a reference ready for LaTeX using the <CMD>+K key combination, and then simply paste it in Latexian and that was you done with including a reference in your thesis.
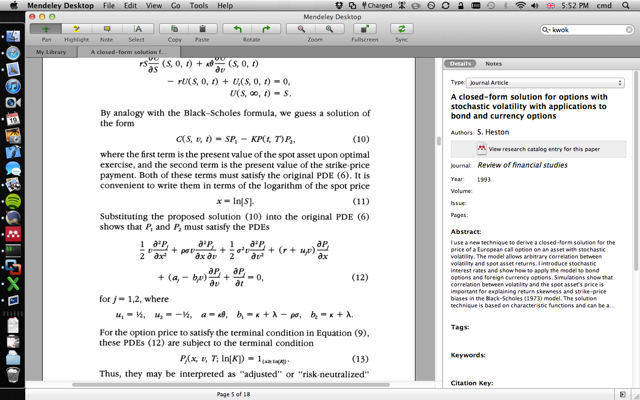
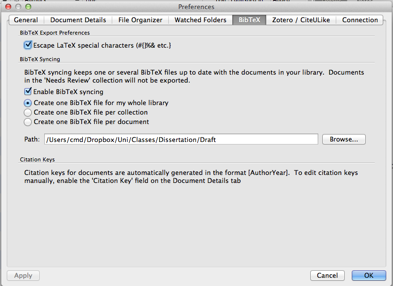
- In order to fully automate this I also had Mendeley create my BibTex file that I used in the Tex document. I did that by setting the path of the library file (In PreferencesBibTex-> Enable BibTex syncing) and pointing it to the same folder where my dissertation tex file was. This way any time I added a paper or bibliography entry in Mendeley it was immediately available in Latexian to be typesetted.
- You can find the entire bibliography I used in this file. This is mainly focused on Financial Mathematics, Stochastic Volatility, Quasi/Pseudo Random Numbers, Monte Carlo simulations, etc. There is also this Mendelay Group that I’ve set up to have a look at the bibliography and contribute to it if you so desire. There are 170 references thus far.
- Command Line
- I used the command line quite extensively, from Matlab development and execution to ViM and editing Matlab and LaTeX code. The following is a list of things I had installed in order to work more efficiently.
- Homebrew
- This is the package manager from heaven. It does exactly what is says on the box and it has really made installing programs I was used to in Linux to the OSX platform. You can install it very easily by:
-
ruby -e "$(curl -fsSL https://raw.github.com/gist/323731)"
- From then on “> brew install …” is your ticket to most of the *nix tools.
- iTerm2
- It is much more flexible than the normal terminal, offers tabs, and better color scheme integration. I use the solarized theme for iTerm and ViM and this app really helped with that.
- Tmux
- This terminal multiplexer allows to have multiple terminals at different layouts and really speeds things up quite a lot. It is effectively the canvas on which you can build an IDE for development. My set up for Matlab came very close to being a full Matlab IDE.
- Install via :
$brew install tmux
- Install via :
- Jump
- This was a very useful bookmarking tool for the command line. It allows to jump from directoty to directory with ease and poise! Install via:
sudo gem install jump
- This was a very useful bookmarking tool for the command line. It allows to jump from directoty to directory with ease and poise! Install via:
- More PRO tips here: http://coderwall.com/p/u/cmdel
- Work productivity
- This installation was a life saver!
- sudo gem install work
- Everytime I tried to go to a procrastination site I got this image:
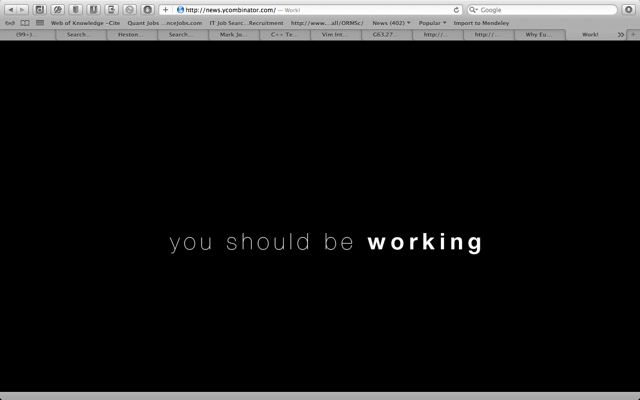
- You would not believe how extremely motivational it was not to be able to procrastinate on Hacker News!
- Additional tools
-
$brew install htop reattach-to-user-namespace 7z ack wget httrack git legit
-
$brew install aspell --lang=en_GB
-
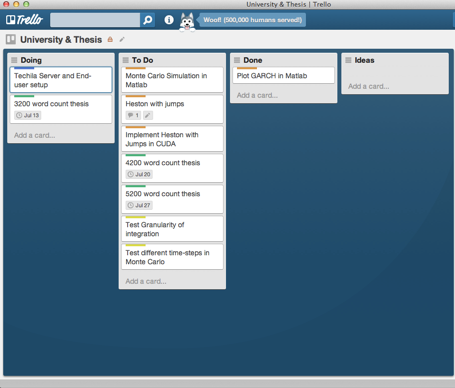
- Trello
- This was a last addition to the stack, but a very useful one. I found that the card representation was very intuitive for milestones in the project. While I had small todos in the command line tool, I had the larger milestones with due dates in Trello.
Well I think that’s all of it! I’m sure I’m forgetting things, and I’ve glossed over some of the details of others. If you want more implementation details as to how something in specific was set-up don’t be shy and leave a comment. I’ll try to get to it as soon as I can.I hope you’ve enjoyed this post.I’m off for my holidays tomorrow, so I might be unreachable for a while.
See you all in October.
Pingback: Writing… | Stretch and Squash